
walkthrough · Combat
Star Wars Zero Company Combat Guide
Use cover, flanking, elevation, action discipline, and target priority to control tactical battles.
Answer first
Quick Answer
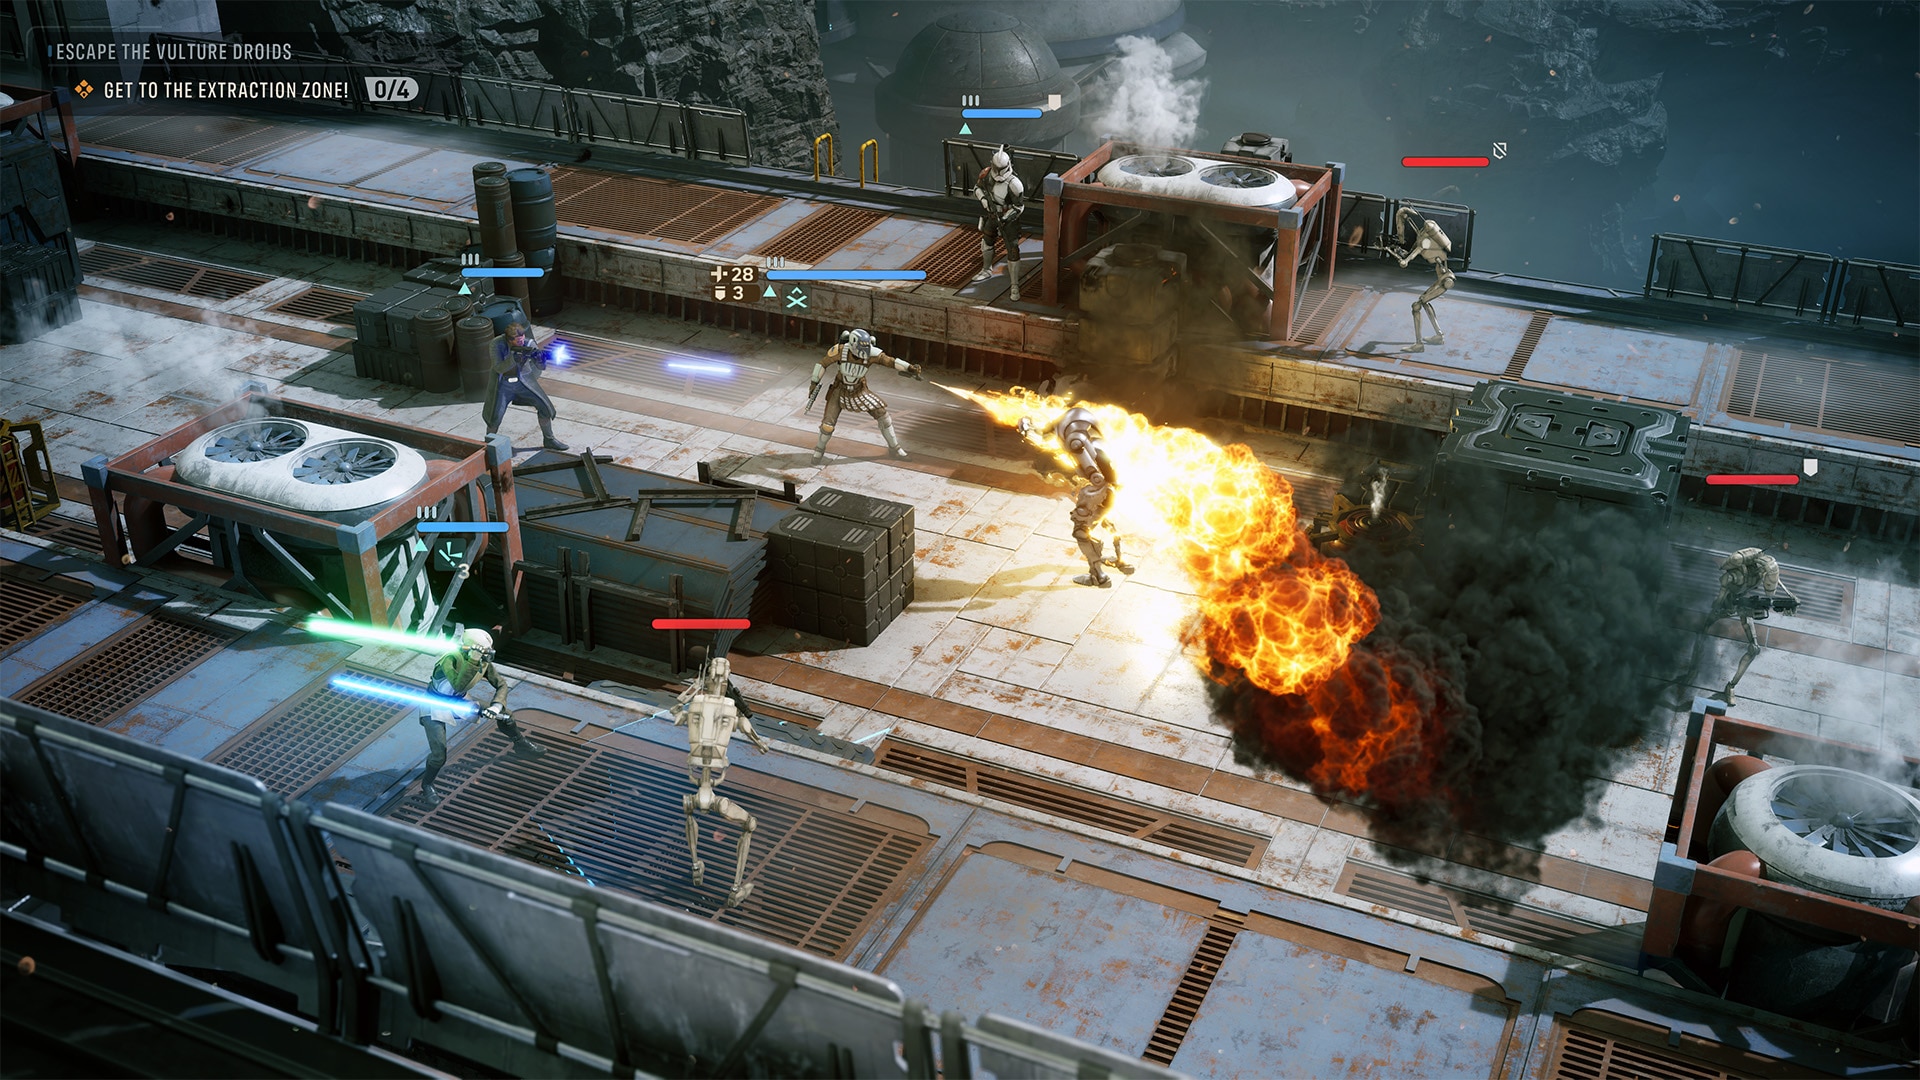
Treat cover and actions as resources. Move only as far as needed to gain protection or a better angle, use flanking or high ground to improve attacks, and avoid ending a turn where destructible cover is your only defense. Focus enemies that threaten the squad's plan, not simply the nearest target.
On This Page
Why This Matters
Official gameplay material identifies partial and full cover, flanking, elevation, destructible cover, movement costs, downed Operators, wounds, and revival. The practical lesson is that a strong turn improves both the current attack and the position inherited by the next turn. The key is to make decisions that remain useful after the first successful turn. Zero Company links battlefield choices to roster health, relationships, and preparation at the Den, so a locally strong move can still create a weak campaign position. Use the framework below as a repeatable checklist, then adapt it to the objective and Operators actually available.
Key Takeaways
- Read enemy lines and objective pressure before moving the first Operator.
- Use the shortest safe movement that creates the required angle; longer movement consumes more action capacity.
- Flank or gain elevation when a protected target cannot be attacked efficiently from the current lane.
- Break or abandon destructible cover before enemies can expose the squad around it.
- Remove enemies that can disable, flank, or finish a wounded Operator before low-impact targets.
Step-by-Step Approach
1. Read enemy lines and objective pressure before moving the first Operator
Read enemy lines and objective pressure before moving the first Operator.
2. Use the shortest safe movement that creates the required angle; longer movement consumes more action capacity
Use the shortest safe movement that creates the required angle; longer movement consumes more action capacity.
3. Flank or gain elevation when a protected target cannot be attacked efficiently from the current lane
Flank or gain elevation when a protected target cannot be attacked efficiently from the current lane.
4. Break or abandon destructible cover before enemies can expose the squad around it
Break or abandon destructible cover before enemies can expose the squad around it.
5. Remove enemies that can disable, flank, or finish a wounded Operator before low-impact targets
Remove enemies that can disable, flank, or finish a wounded Operator before low-impact targets.
6. End with a recovery plan
End with a recovery plan: cover, distance, control, or an ally able to revive.
Conditions and Comparisons
Use a stable comparison: keep the mission, difficulty, and surrounding squad as similar as possible, then change one Operator, ability, or priority. Compare objective progress, wounds taken, actions lost to repositioning, and how often the intended role produced value. This is more reliable than judging a decision from one damage number or one favorable map.
The official information supports role-based planning, customizable Operators and loadouts, squad bonds, tactical positioning, and campaign consequences. It does not support a universal ranking for every mission. Where this guide discusses a “best” choice, it means the option that completes the current plan with the fewest uncovered risks.
Common Mistakes and Important Notes
- Spending every action on movement without creating an attack or safe endpoint.
- Clustering the squad where one enemy effect can punish everyone.
- Remaining behind damaged cover for another turn.
- Chasing hit chance while ignoring the mission objective.
Do not treat launch advice as a permanent patch-specific tier list. Recheck official notes when mechanics change, and separate confirmed system behavior from community preferences. If a tactic depends on an exact numerical threshold not documented by the official sources, test it in the current game before committing campaign resources.
FAQ
How important is cover?
Official guidance calls cover fundamental; full cover offers more protection than partial cover.
How can accuracy be improved?
Flanking and attacking from high ground are official ways to improve an attack opportunity.
What happens when an Operator is downed?
A downed Operator cannot act but can be revived by an ally; the Operator also suffers a wound.
Next Steps
Return to the Star Wars Zero Company portal for the connected squad, class, combat, mission, and progression guides. The related guide list below stays within this game so each answer leads to the next relevant decision.
Practical Checklist
- Build Captain Hawks and the squad around complementary tactical roles.
- Use cover, positioning, and coordinated abilities before chasing damage alone.
- Keep recommendations within systems confirmed by official EA and Bit Reactor material.
Common Mistakes
- Inventing companion rankings or mission outcomes before release.
- Treating cinematic footage as a complete mechanical specification.
- Building every squad member for the same tactical job.
Related Guides
Quick Start
Treat cover and actions as resources. Move only as far as needed to gain protection or a better angle, use flanking or high ground to improve attacks, and avoid ending a turn where destructible cover is your only defense. Focus enemies that threaten the squad's plan, not simply the nearest target.
Area Walkthrough
Priority 1
Read enemy lines and objective pressure before moving the first Operator.
Priority 2
Use the shortest safe movement that creates the required angle; longer movement consumes more action capacity.
Priority 3
Flank or gain elevation when a protected target cannot be attacked efficiently from the current lane.
Priority 4
Break or abandon destructible cover before enemies can expose the squad around it.
Priority 5
Remove enemies that can disable, flank, or finish a wounded Operator before low-impact targets.
Priority 6
End with a recovery plan: cover, distance, control, or an ally able to revive.
Next Area
Return to the Zero Company portal and choose the next connected guide.
How this answer was checked
Sources & Verification
- EA official Star Wars Zero Company pageofficial
- EA official gameplay overviewofficial
- EA official community Q&Aofficial
More verified answers
Related Guides

Star Wars Zero Company Squad Composition Guide
Compose the squad from the mission backward. Cover dependable damage, control or disruption, survival, and objective access, then check that Operators can work at compatible ranges. Use bonds as a tiebreaker, not a reason to deploy a lineup that cannot answer the operation's main threat.
Verified guideStar Wars Zero Company Difficulty Guide
Difficulty should match the amount of tactical punishment and campaign recovery you want to manage. Official information confirms selectable difficulty, optional permadeath, and limited saves on higher difficulties. Adjust these settings deliberately; a harder campaign changes roster risk as well as individual battles.
Verified guideHow Permadeath Works in Star Wars Zero Company
Permadeath is enabled by default but can be turned off. On standard difficulty, an Operator who loses all health is downed and takes a wound; an ally can revive them, but wounds reduce combat statistics, and accumulating three wounds causes permanent death. Protect injured Operators and maintain roster depth.
Verified guide
Star Wars Zero Company Beginner Guide
Begin by covering essential squad roles instead of chasing a single strongest Operator. Enter each mission with a plan for cover, movement, recovery, and objective pressure; keep one ability available for emergencies, and develop Operators together so their bonds and combat synergies grow.
Verified guidePermadeath Settings Explained
Permadeath is enabled by default but can be disabled, so choose the campaign consequence level before investing in a long run.
Verified guide